Sunday, January 1, 2012

I Actually Carved an Owl from a Rock

My friend Kathy & I saw this fabulous owl 
in a garden center and she fell in love with it.
It was very expensive and so she passed on it,
but kept talking about it and how much she loved it.
 Soooo....I thought "maybe I could make one"....
How hard could it be. 
It looked like a fairly simple design...
I could give it to her for Christmas....She would crack up!

So I got a rock

There just happened to be this stone and rock place near me and so after Church one Sunday we stopped in, and asked if I could buy a rock.  The man was so nice and helped me pick it out....climbed on the rock pile himself, so I wouldn't get hurt, and gave it to me for free

  Now I had to cut the bottom of the rock flat so it would stand up

Since I don't have a tile saw, I needed to cut it with a circular saw and a masonry blade.  All fine and good except I forgot that the rock was thicker than the saw blade

I needed a 7" masonry blade....well actually 2 of them but they are inexpensive at about $5.00 ea

Don't forget the safety glasses and the hammer & chisel were very useful
You have to make sure the rock is wet because the blade gets very hot.....and work in small time increments...like 5 minutes at a clip                      


It actually went through the rock pretty easily but there was one thing I forgot.  The saw blade is not as deep as the rock so I had to work from all sides.  At the end, when I had cut as deep as the blade would allow, I had this lump in the middle....not so good
So my husband suggested that I cut lines in the lump and chisel them off....worked great.  The bottom was not as smooth as the Garden Centers owl but it would stand!   OK on to the next step!

 I printed out a photo of the Garden Center Owl and then proceeded to sketch something similar to it on the rock, allowing for the difference in the shapes of the rocks. 
It looked like a demented ghost....I got nervous!


But onward I would press, so I started with the Dremel.  What the heck....how bad could it be?  What had it cost me so far....$10.00 for blades and 2 weeks of cutting a rock off at the bottom in my spare time.
 The first layer came off quite easily but as I went deeper it took longer to make any progress.  I knew now that I would      not get that nice deep crater that made the eyes on the original owl.   Mabye it would come out like a demented ghost.....we'll see.

I kept at it, in my spare time, for several weeks....going through about 6 or 8 Dremel tips, but at about $3.00 each, it was affordable.  I would have gone through less but I broke two before realizing that it worked just as well even when you didn't press down with all your might.  Like my Dad used to tell me "let the tool do the work".  The old paint brush was great for brushing the dust and eye protection and a dust mask were necessary.

New dremel tip    -    Used dremel tip
There were many kinds of tips to choose from and towards the end I started finding
larger ones that lasted longer and went deeper. 
 Now it was time for the finishing touch - The eyes.  I scoured every bead store in a 50 mile radius and the best I could come up with was these lifesaver shaped black glass beads....so they would have to do.
I was happy with the final result......owl or demented ghost?   Owl I think

A little epoxy

Get him to lay level while the glue sets

And Here He Is......tada.....an Owl

 She was quite happy with her owl 
and knew it was made with lots of love
Merry Christmas Kathy!

Tuesday, November 29, 2011

ism's - Adorable Things Kids Say

When my kids were little, life was very busy. 
I would try to remember the adorable things they said, but much of it slipped away. 
I used to write things in their baby books once or twice a year,
but as time went by, several years got skipped.  
Then I would frantically try to catch up, 
sometimes writing things that spanned a few years. 

I didn't want those adorable things lost for my grandchildren,
so I made this box for easy access in writing things down.

I have four grand daughters, ages 4, 3, 2 & 1 and another grandchild on the way.
I think this box will eventually contain tons of wonderful memories.

I am thrilled that Ayla telling me not to forget her sticklips (chapstick) or
Kierslynn telling me all about how "time-out" works are priceless and will not be lost.

The box was easy enough to make. 
A can of spray paint on a wooden box from Michaels
along with some stick on embellishments,
but any recycled recipe box etc. will do. 


I used  Hallmark card software that I had installed on my computer to design  the cards.


I wish I had one of these....

when my oldest asked me if "Daddy & I really did that" while holding his head in his hands 
after finding out I was pregnant with my youngest
or
when my middle one broke out in song in a supermarket at 4 years old 
belting out a very loud version of
"Don't You Want Me Baby" by The Human League, to the shoppers delight
or
when my daughter wanted me to use the "Vice-a-vator" on her and I finally figured out 
she wanted me to get out the vaporizer to put in her room

There were so many more....
that are like wisps of memory now....
once in awhile one pops up in my mind, 
and when it does, I will write it down.

Thursday, November 17, 2011

Vintage Inspired Christmas

I found these 3 little lovely card or photo holders in a thrift store today for $1.  I just couldn't leave them there...but what to do with them?  
That was the question.
I thought of searching through old family Christmas photos but that seemed to be a daunting task.  My Mom was great at organizing, sorting, boxing, displaying etc. photos and photo books....me....not so much.

Sooooo...I thought maybe I could get some cool vintage photos online to print...YES....there were hundreds to choose from.....

So here is my display....in 10 minutes....this is what I came up with.

 
I decided on copies of old post cards,
since vintage photos of people I didn't know seemed weird.  
I used a cream colored card stock and trimmed them to size 
with a paper cutter to get nice straight lines.

and ps:  I found these Department 56 bottle brush trees yesterday at Savers for only $2.  A Savers just opened up near me and it was the first time I had been there.  My Mom used to take me to a Savers in Arizona
but I didn't realize it was a chain thrift store....
Now It will be one of my new haunts!


Saturday, November 12, 2011

Eyeglass Holders For Every Room

I love eyeglass holders.....
I have one for every room and then some.
This is my ever-growing collection
 I want to be able to put my hands on a pair of glasses instantly....wherever I am....because it is soooo annoying not being able to see.  I used to have perfect vision....this getting older thing is hard to get used to.....but better than the alternative......ha ha
I just found a new one at a yard sale but it's a little beat up so I decided to give it a quick little face lift.
with this
 and this


I have tons of these foamy stickers in my stock.  They are perfect for my granddaughters little fingers to peel and stick onto all sorts of craft items.  They love them.
I picked one that was the least kid-like....a leaf....and stuck it on.
I taped up the inside with painters tape so as not to ruin the red velvet inside.
Then just spray painted with Rust-oleum Hammered Paint & Primer In One, in Rosemary which is a pitted metal with a gray-green tint....Love it!
Here is the next project I'll be working on.....can't wait to get started.  I found 2 of these at a sale for $25.00!

What a SCORE!!!

Friday, October 21, 2011

Incorporating a Window into a Headboard

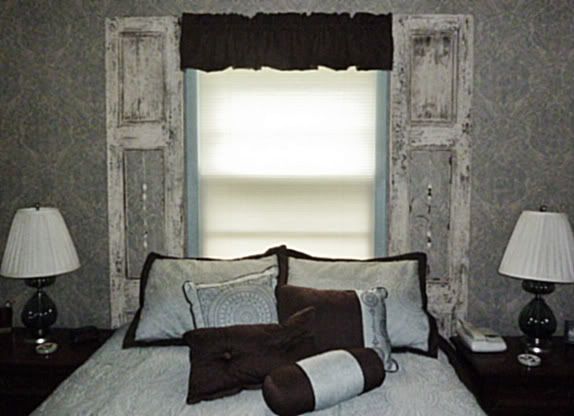
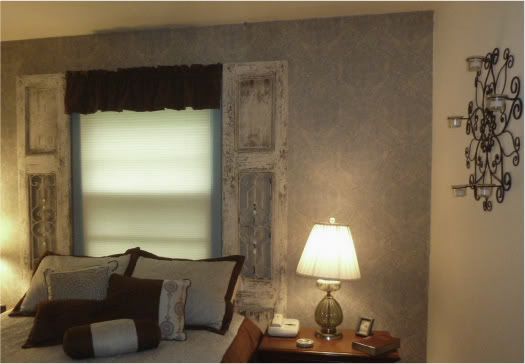
I needed to incorporate this window 
into some sort of headboard for the bed.  
I hated the way a regular headboard blocked the window. 
We like to open and close it without getting out of bed.

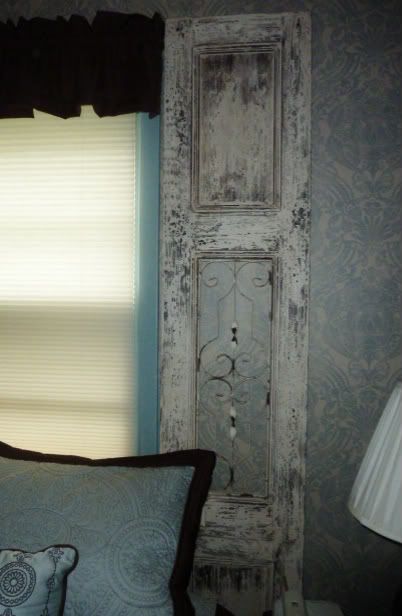
I found these two side panel doors in a catalog.  
They were the perfect size. 
I had been looking for vintage doors 
for several years.....to no avail.  
I loved the distressed look and the wrought iron element
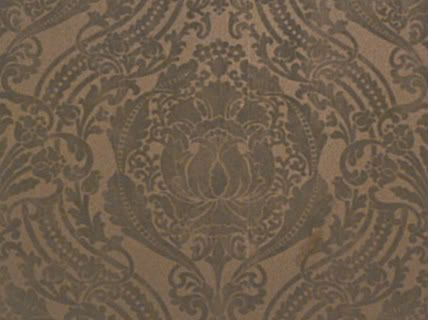
The wallpaper is a soft but intricate pattern 
that somewhat mimics the bedding.  
The rest of the room is cream, 
including the ceiling so the entire focus is on this wall.
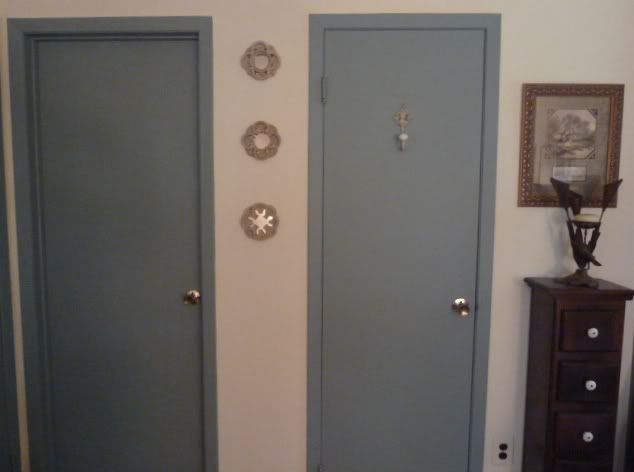
I painted all of the molding and doors in the room the soft blue green color taken from the wallpaper and bedding.
My Dad made the candle stand for me many years ago. 
I had seen it in a magazine and couldn't afford it....
so he made me one. 
He is a man of many talents 
and can still run rings around me at 82.
 Here he is with my sons....Love You Dad
 
I pulled in other wrought iron elements.  
This piece was found at a yard sale about 5 years ago.  
It had been waiting for just the right home.
The room is serene and cozy....
I'm quite happy with how it turned out.

Tuesday, October 11, 2011

Ideas For a "Positively Pink" 1st Birthday Party

My Granddaughter's 1st Birthday Party was a Huge Hit!
Her Mom, Nicole, worked overtime to make it perfect.
I was super impressed with her efforts....take a peek.....
The color-coordinated candy, cakes and cookies
were creative, inspiring and endless....


The Display was just as beautiful.

 
Even her diaper was a thing of beauty!
Nicole didn't miss a trick.....planned out to the smallest details.
Happy 1st Birthday to my Beautiful Kylee
I love you and miss you,  Grandma